
Visual Studio Project Set Up
Create A Project
Start creating new project and select Visual C# > Web and ASP.NET Webapplication (.NET Framework).

Select an empty template and apply the settings as shown.

Add PayPal Package To Web Project
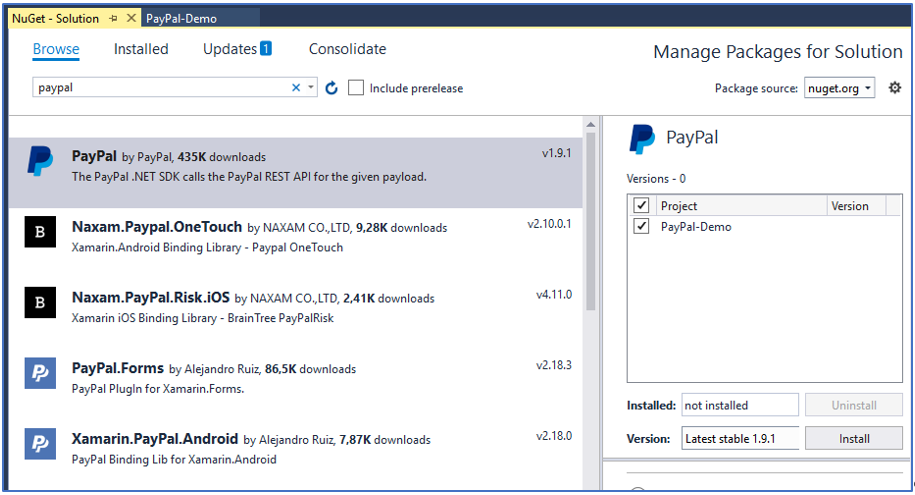
Select Tools in Visual Studio menu and click to NuGet Package Manager. Type paypal in search field and search for PayPal API . Select marked component in picture and install latest stable version.
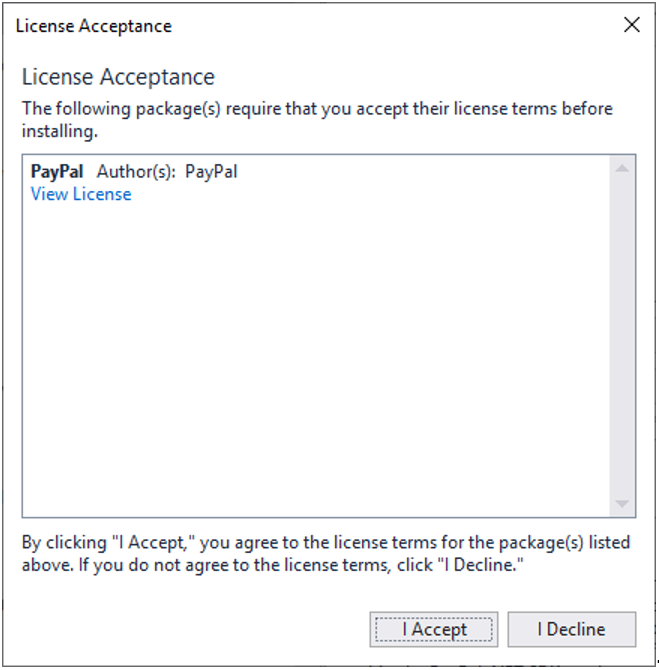
Accept the license terms.
Useful Information About Sample Project
The project consists of several pages and classes. The most important pages and classes I want to describe in this chapter.
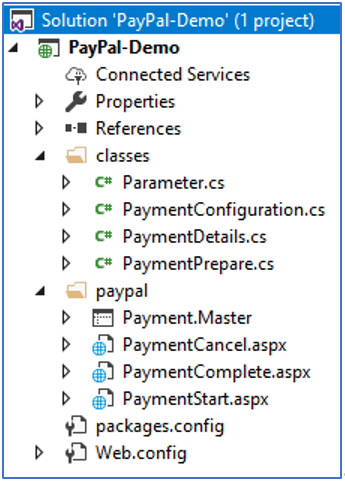
PaymentStart.aspx
Startpage of payment process. This page prepares the payment process and authorizes the paypal user. There are defined a payment cancel and a payment complete URL in this page.
PaymentCancel.aspx
Hopefully a customer never sees this page… Payment cancel URL is used in canceling by user or in case of error.
PaymentComplete.aspx
The PaymentComplete page is called if the PayPal user is authorized. This page starts the current payment process. The money will transfer now.
PaymentConfiguration.cs
The class defines the sandbox and live data (client ID and client secret) for payment process. Here the mode sandbox or live is set.
PaymentDetails.cs
An object of PaymentDetails class stores details of payment process for later use. The object is transfered as session object during the payment process.
PaymentPrepare.cs
PaymentPrepare class extracts all methodes to prepare a payment process. I do this for use in other pages also. The methods can also be implemented in PaymentStart.aspx page.